How to automatically import WFS Buildings for a new Project
How to automatically import WFS Buildings for a new Project:
- Select or create a project that will become a Template Project
- Open this project in editor mode.
- Select Tools in the ribbon bar.
- Hover over Geo Plugins and select Add Building Plugin
- With the new Geo Plugin selected, click on the Select link next to source in the Geo Plugin Detail Panel.
- Add or select a new WFS Source.
- Select a layer of the WFS Source.
- Select a feature attribute for the name.
- Select the GeoLinks tab
- Click on the Add button to add a new GeoLink
- In the GeoLink detail panel (bottom), click on the Select Function Button and select a Function
- (Optional) Adjust the link name
- Select the Matching Attributes tab
- (Optional) Add a matching attribute to filter which features are added by this Geo Plugin as new buildings.
- Select the Mapped Attributes tab
- (Optional) Add or Select any feature attribute values that you want to copy to created buildings.
- Select the Additional Attributes tab
- (Optional) Add attributes with specified values that are always added to created buildings.
- Save the project and close it (Disable Keep Alive).
-
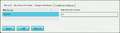
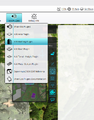 Adding a new Geo Plugin
 -
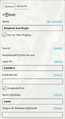 Source configuration of the Geo Plugin
 -
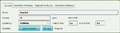 GeoLink General configuration
 -
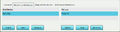 GeoLink Matching Attributes configuration
 -
 GeoLink Mapped Attributes configuration
 -
 GeoLink Additional Attributes configuration


How to How to automatically import WFS Buildings for a new Project (Part 2):
- Open the Tygron Client Application and login using a Domain Admin account.
- Select the Project created in step one.
- Check the Template Checkbox.
- Select new project
- Check the option Use Template
- Select the just created Template Project
- Provide a new Project name and click create.
- Select a world location for which the Geo Plugin's source has features
- Create the project
- Once created, Hover Over Overlays in the Ribbon bar and under Topology, add a new Source Overlay, and in the Geo Plugin's source in the Source Overlay Detail Panel.
-
 Checking the Template Box in the Projects panel using the Domain Admin
 -
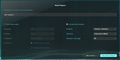 Creating a new Project with the Hospitals Template
 -
 Selecting a Region
 -
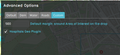 Inspecting the Geo Plugin status in the Custom tab in the Additional Options.
 -
 Inspecting the Source Overlay
 -
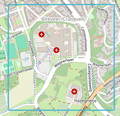
 Source indicated for the Hospital Building


